
E-Coder 2 Controller
Out of stock
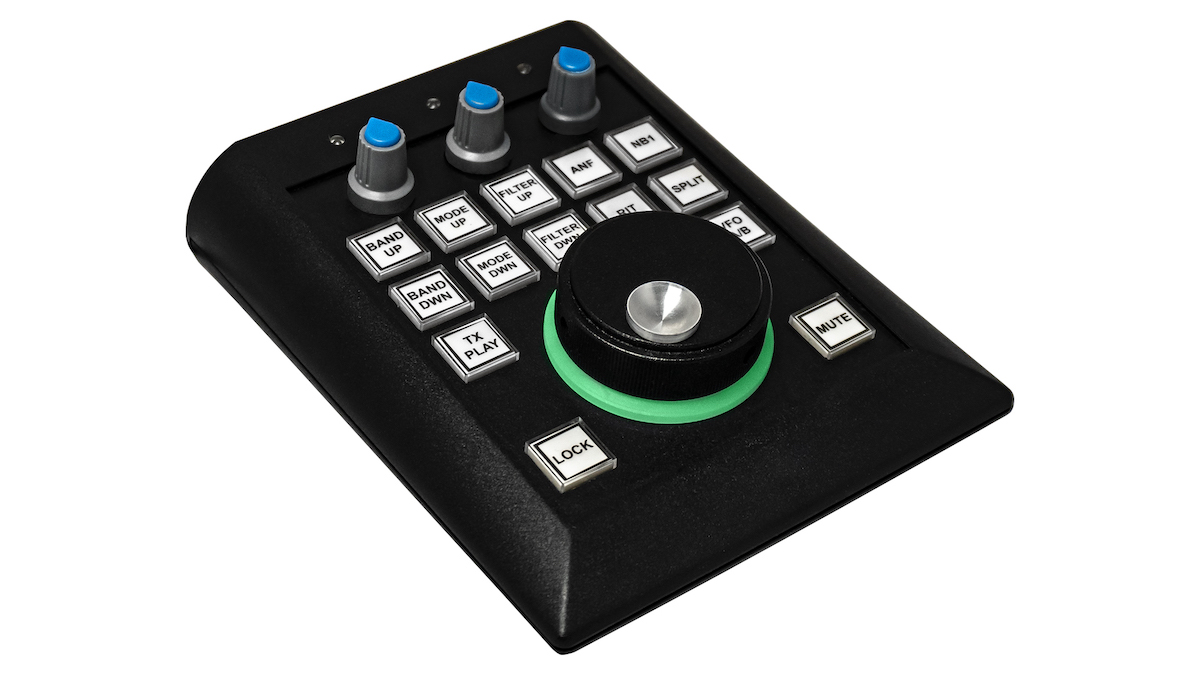
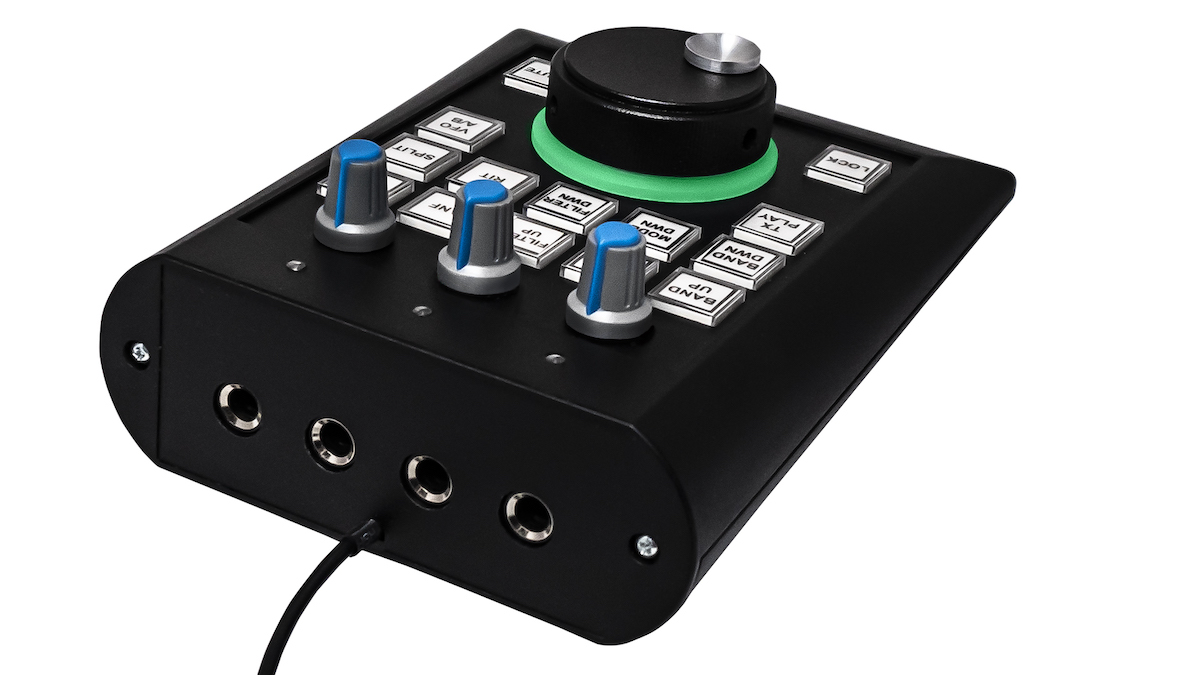
The new E-Coder 2 for Expert Electronics transceivers is optimised for Remote and Contest use. With it’s onboard high quality sound card, there is no latency in CW sidetone or mic audio.
867.07 $
Out of stock
The E-Coder 2 panel was designed to control Expert Electronics SDR devices with a focus on remote operation. It has a high quality low latency sound card on board to solve the common SDR issue with latency/delay of monitor audio. This especially important to CW operators operation remote. In addition it has the same wide range of functionality as the E-Coder 2, which makes it the perfect controller for serious DX and contesting.
The E-Coder 2 has a VFO optical sensor that produce 1024 pulses per revolution compared to 200 pulses per revolution for the standard E-Coder EP. This allowed for more precise fine-tuning when using maximum zoom in the spectrum.
In the Panel menu, you can see the settings of the E-Coder 2 control panel. In the drop-down Device menu, you can select the type of the connected control panel. In the meantime, only one type is available – E-Coder. Note! If one E-Coder 2 panel is connected to the transceiver, in the Panel menu displayed one E-Coder tab, if several E-Coder panels are connected to the transceiver, in the Panel menu displayed a several tabs E-Coder #1, E-Coder #2 etc. with identical settings for each panel.

In the left part of the menu, you can see the schematic picture of the E-Coder panel with buttons and knobs. Press any button, you’ll see the list of the available functions.
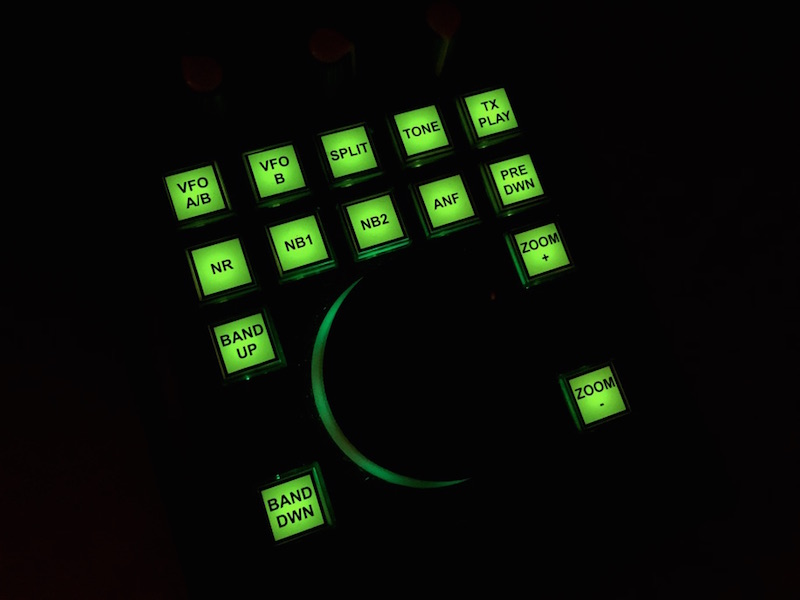
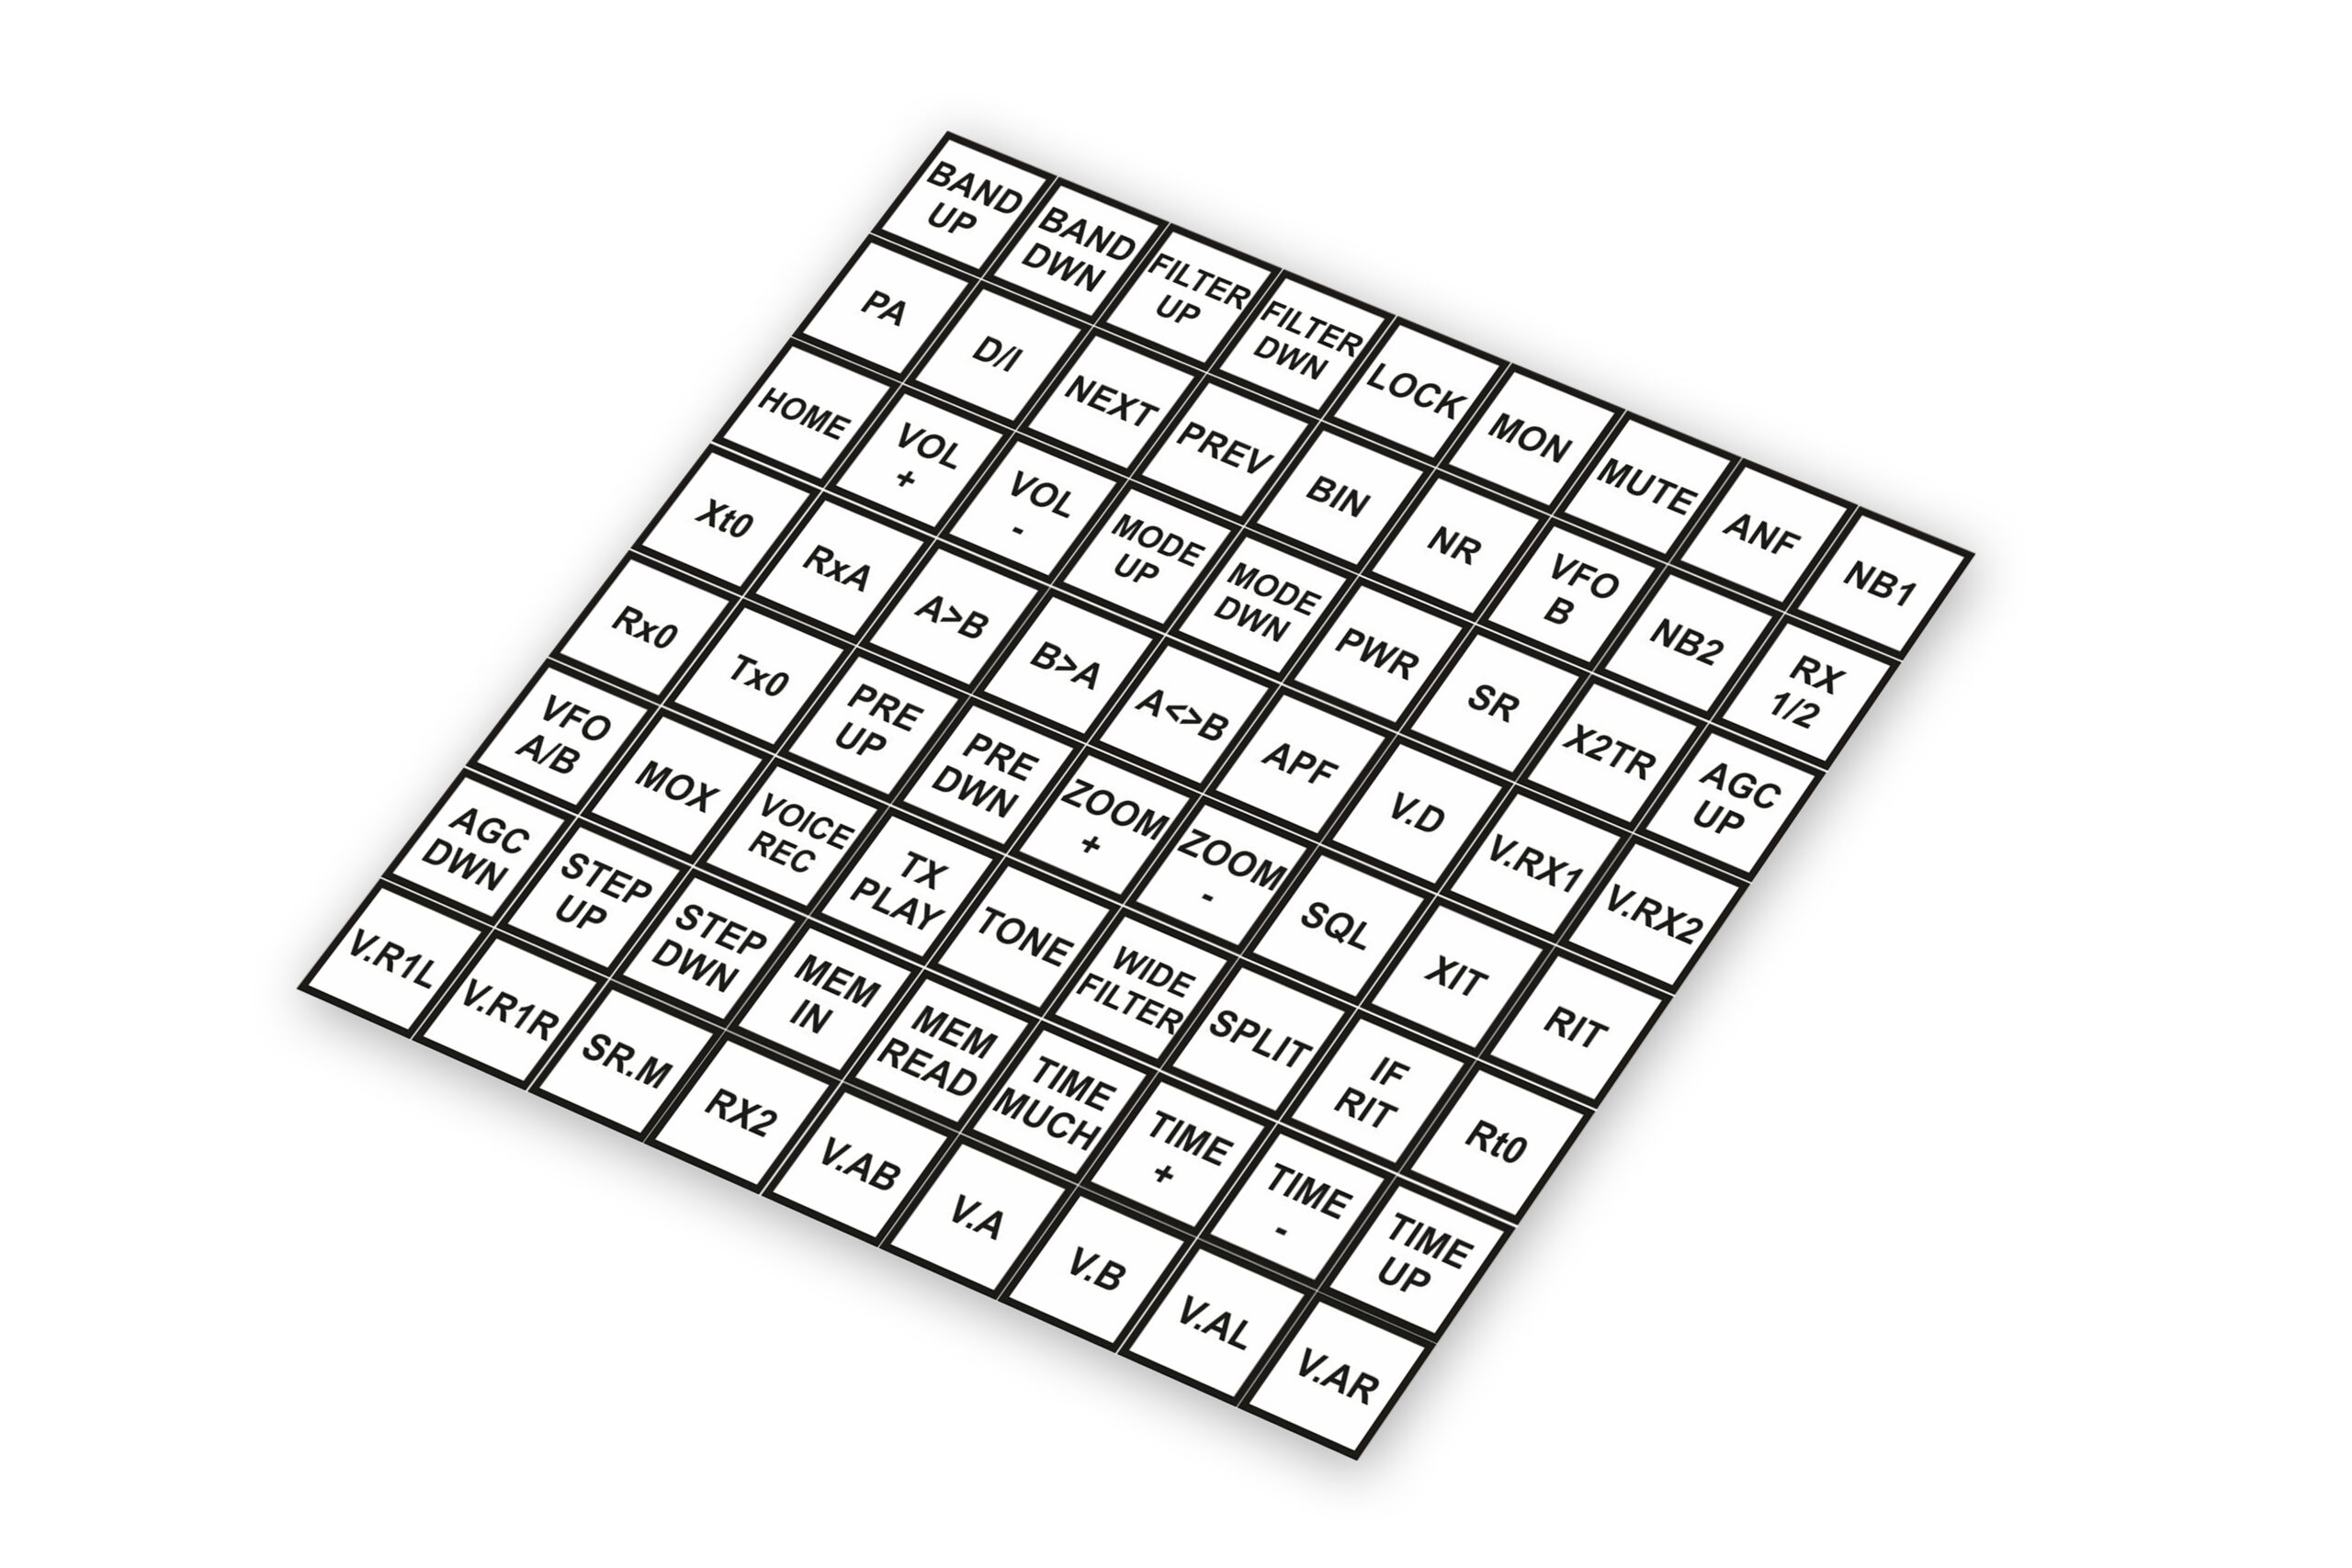
The following functions may be assigned to the E-Coder panel buttons:
- Unused – button is unused.
Main:
- AGC Up/Down – AGC type switching
- Band Up/Down – band switching
- Filter Up/Down – receiver’s filter switching
- Mode Up/Down – mode switching
- MOX – enable/disable manually operated transmit mode
- PA – enable/disable power amplifier
- Preamp Up/Down – preamp or attenuator level switching
- Power ON/OFF – transceiver’s power on/off
- RX ANT – enable/disable receive antenna
- Step Up/Down – change the tuning step
- Tone – enable/disable tone signal in TX mode
- WF – enable/disable Wide Filter. Filter for all Nyquist zone. If in the Device menu settings, you set Auto enable checkbox, then you don’t need this function on the panel
- Zoom In/Out – spectrum zoom modes switching
VFO/RX2:
- A>B – assign the frequency from heterodyne VFO A to heterodyne VFO B
- B>A – assign the frequency from heterodyne VFO B to heterodyne VFO A
- B<>A – frequency exchange between VFO A and VFO B
- Change VFO A/VFO B – switching between VFO A and VFO B
- IF as RIT – tune the RIT offset by moving the filter over the panorama
- LOCK – lock the frequency tuning
- RX2 On/Off – enable/disable RX2
- RIT On/Off – enable/disable RIT offset
- RIT Reset – reset RIT offset to 0
- Sub RX On/Off – enable/disable SubRX
- Split – enable/disable Split mode
- Switch DDS/IF – tuning the frequency by moving the filter over the panorama, in other words changing the digital IF, or when filter stands still and spectrum moves, this is the central frequency tuning
- Switch Receiver – switching between software RX1 and RX2. The main knob will tune the frequency of one of the receivers
- XIT On/Off – enable/disable XIT offset
- XIT Reset – reset XIT offset to 0
While you operate both RX1 and RX2, usually you need to listen to either only one of them or both of them, but in different channels (left / right). To do that we added special functions to the E-Coder panel, which set the mixer for both RXs
Audio:
- Listen both RX1, RX2 – default settings, both RXs have equal volume in both channels
- Listen RX1 only – listen to the RX1 in both channels
- Listen RX2 only – listen to the RX2 in both channels
- Listen RX1 in left channel, RX2 in right – listen to the RX1 in the left channel and RX2 in the right channel
- Listen RX1 in right channel, RX2 in left – listen to the RX1 in the right channel and RX2 in the left channel
Similar settings were added for VFOs:
- Listen both VFO A/B – default settings, both VFOs have equal volume in both channels
- Listen VFO A only – listen to the VFO A in both channels
- Listen VFO B only – listen to the VFO B in both channels
- Listen VFO A in left channel, VFO B in right – listen to the VFO A in the left channel and VFO B in the right channel
- Listen VFO A in right channel, VFO B in left – listen to the VFO A in the right channel and VFO B in the left channel
- Mute – switch off the sound
- Switch RX and mute former – change the software receiver and mute former one
- TX/Play – turn to TX and play the signal record in air
- Voice recording – enable/disable voice recording
- Volume Up/Down – volume adjustment
DSP:
- ANF – enable/disable auto notch filter
- APF – enable/disable analog pick filter
- BIN – enable/disable binaural mode
- NR – enable/disable noise reduction
- NB1 – enable/disable noise blanker 1
- NB2 – enable/disable noise blanker 2
- SQL – enable/disable squelch
The following functions may be assigned on the E-Coder panel knobs:
- Unused – encoder is unused
- Volume – volume adjustment
- Mic Gain – Mic gain adjustment
- SQL – squelch threshold adjustment
- Filter Low/High – tuning the frequency of the low/high filter’s front
- Filter Width – adjusting the filter width
- Filter Shift – shifting the filter’s central frequency
- Drive – adjusting the output power
- IF – tuning the frequency by moving the filter over the panorama
- RF Gain – RF Gain control
- CW Speed – CW Speed control
- RIT Offset – adjusting the RIT Offset
- XIT Offset – adjusting the XIT Offset
In the right part of the menu you can see the main panel settings:
- Enable – enable E-Coder panel control
- Use IF – frequency tuning by moving the filter over the panorama
- Use IF as RIT – tuning by IF when the RIT offset is on
- Use IF as XIT – tuning by IF when the XIT offset is on
- VFO B – enable sub-receiver
- Key Led – enable backlit keypad
- Encoder Led – enable backlit encoder
- RX1/RX2 menu – switching between RX1 and RX2 receivers, or assign an exact E-Coder panel to your receiver
- Volume – set the volume change step, per knob’s clack
- Mic Gain – set the Mic gain change step, per knob’s clack
- SQL – set the squelch threshold change step, per knob’s clack
- Filter High – set the filter’s high limit change step, per knob’s clack
- Filter Low – set the filter’s low limit change step, per knob’s clack
- Filter Width – set the filter’s width change step, per knob’s clack
- Filter Shift – set the filter’s shift change step, per knob’s clack
- Drive – set the output level power change step, per knob’s clack
- RF Gain – set the RF gain step, per knob’s clack
Additional functions:
- RX1/RX2 tab – COM-port settings tab for rerouting the PTT signal from the panel to the COMport
- Enable PTT Transfer – rerouting of the PTT signal from the panel to the COM-port. Set the Enable PTT Transfer checkbox to enable rerouting the PTT signal
- Port name – COM-port number
- DTR/RTS – select the COM-port line, which is used for transferring the PTT commands. Set one of the DTR/RTS line checkboxes to set it as the control line.
Based on 0 reviews
Be the first to review “E-Coder 2 Controller”
You must be logged in to post a review.
Related products
-
Controllers, Transceiver Accessories
micro KEYER 2R+ (MK2R+) SO2R Interface
The MK2R+™ from microHAM is the most powerful All-In-One multi-mode two radios USB controller for CW, SSB, AM, FM, and digital modes (RTTY, PSK31, SSTV and many others) designed for the serious contest operator or DXer with two transceivers. Ii is absolutely the most advanced, flexible and capable two-radio interface available today.
Contact us if you need radio specific cables!
SKU: MK2R+ -
-
Expert Electronics, SDR Transceivers, Transceivers
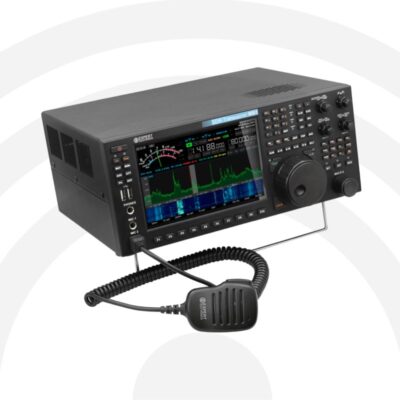
MB1 PRIME High End DUC/DDC Transceiver
The MB1 transceiver is a game changer, it’s a transceiver and a PC in a single package. It has a classic design, developed over several decades, with the most advanced DUC/DDC SDR technologies – Direct Down Conversion (DDC) and Direct Up Conversion (DUC) and a fully featured high-end personal computer with an Intel Core i7 processor on board.
Latest production run includes an updated mother board, I7-9700 CPU, 16GB DDR4 RAM, 500 GB SSD. TX IMD3 has been improved with up to 7 dB! (See updates below colorised in red).
Scroll down to see the video presentation, specifications and to download a brochure.
Read our blog series about the MB1 here.
SKU: MB1P

There are no reviews yet.